
Compatibility is a major concern when people have to shift to macOS. If you think finding the right software is a problem you’re wrong. In a few days or weeks, you can get all the macOS alternative apps you need. The real problem comes when you need to deal with accessories. Let’s not talk about the advanced ones like the printers or scanners, but come to something basic – USB Drives. As you know, USB Drives are quite suitable when you need quick data transfer. Getting the best performance, though, requires you to erase and format a USB Drive on your Mac itself.
Let’s put everything in a practical sense now. You have recently purchased a computer that runs on macOS and you also got a USB Drive. Depending on the purpose of the pen drive, you need to make certain decisions during the formatting process. In this article, we have a quite-detailed guide on how to erase and format a USB Drive and keep it accessible on the devices you like. This guide will be suitable for both beginners as well as those who want to try some experiments with File System techniques on your Mac. Essentially speaking, we’ll help you format a USB drive in the right manner.
Before we start the tutorial, there are a few things to know!
Possible Reasons for Formatting USB Drive using Mac
Some of the common reasons why you may need to format a new/old USB Drive via macOS are as follows. Try to confirm the reason before we move ahead, because there may be some minute differences in the whole process.
- You need to delete all the files, and there are too many files to be individually deleted.
- The drive is currently based on an incompatible file system. You need to change it.
- You’re confused whether the USB Drive has a malware inside. So, you need to clean it up.
If you can relate to the above-mentioned reasons, you can go ahead and format the USB Drive. For the first and third scenarios, you can simply go with traditional USB Formatting. You will need more insight if you’re formatting the drive for the sake of advanced compatibility.
How to Format USB in Mac – Let’s Go Step by Step
Note: For this article, we’re using a recently-bought SanDisk USB Drive of 16GB Capacity. It hasn’t been used before and I’d like to create a Mac-friendly USB Drive. So, the tutorial will be from that perspective. Shall we start?
Step #1
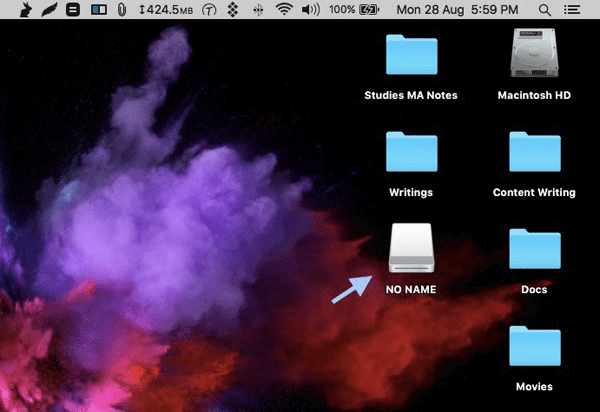
Connect the USB Drive to your Mac device, using the fastest port possible. Wait for a few seconds while your drive will be detected by the computer.
Step #2
We’re using an inbuilt Mac tool named Disk Utility to format USB Drives. In case if you don’t know, it’s quite a powerful tool for managing your disks, partitions and more. It’s one thing I liked about Mac when I shifted into Mac.
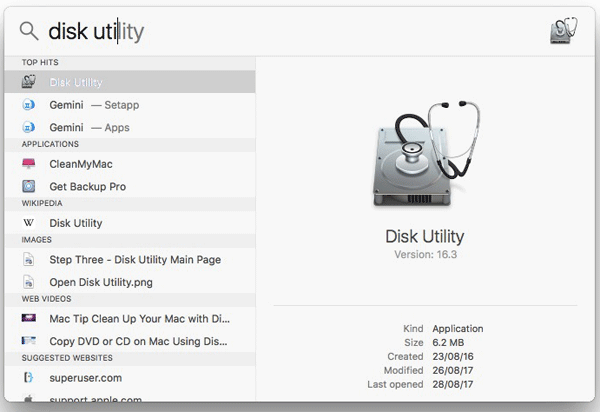
To open Disk Utility, you can simply search for it via Spotlight Search [ Press Cmd+Space and enter the query Disk Utility.] Alternatively, you can find it via Finder Menu à Go à Utilities and open Disk Utility from that list.
Step #3
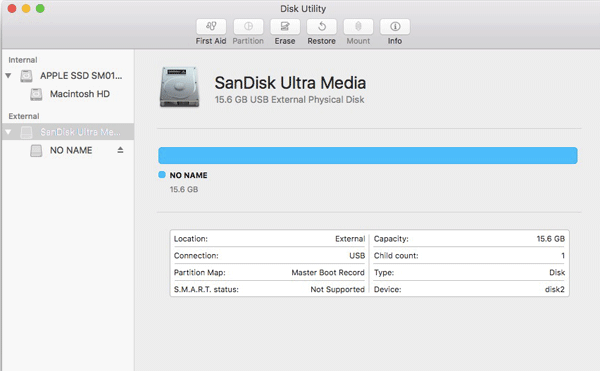
Now, you’ll be able to see the Disk Utility interface of macOS.
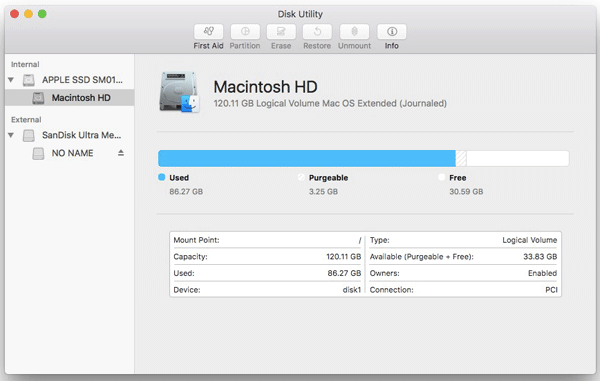
On the sidebar of the interface, you can see two submenus – Internal and External. In my case, there is only one internal partition and you can see the USB Drive we’d connected earlier.
Step #4
To proceed further, you can select the USB Drive from External sub-menu.
In the upcoming page, there will be a toolbar on top position.
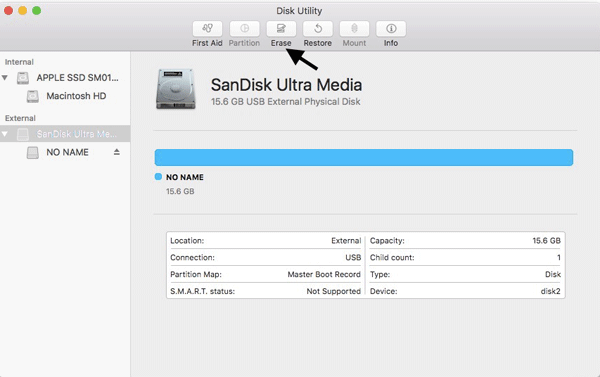
From the menu, choose the button named Erase.
Step #5
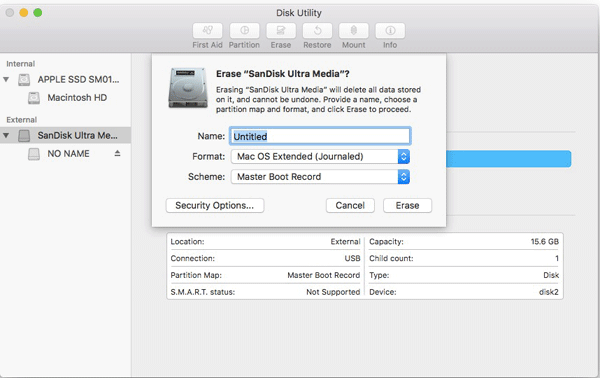
In a second, you can see a prompt window, asking for some details.
Step 5.1
First of all, you can rename the USB Drive if you want. Otherwise, the previous name would be retained. It’s completely one’s choice and doesn’t have much to do with the functioning of the drive.
Step 5.2
More importantly, you must select the appropriate Format of the drive. Here, you have four options, which offer different abilities. We’ll cover the technical aspects later, but a quick overview is necessary. The options you will find are:
- Mac OS X Extended (Journaled) is the native File System of macOS devices. It doesn’t work with most other platforms.
- Mac OS X Extended (Journaled, Case sensitive) is also another Apple-native file system but as its name says, the File System will be case-sensitive, which is not the normal case.
- ExFAT is perhaps the most popular and appropriate file format you can have in Mac. It offers fully-fledged compatibility with macOS and performs well with other devices like PCs and PlayStation.
- MS-DOS (FAT) is also an option while formatting a USB Drive via Mac. It’s also compatible but you’d compromise some performance features.
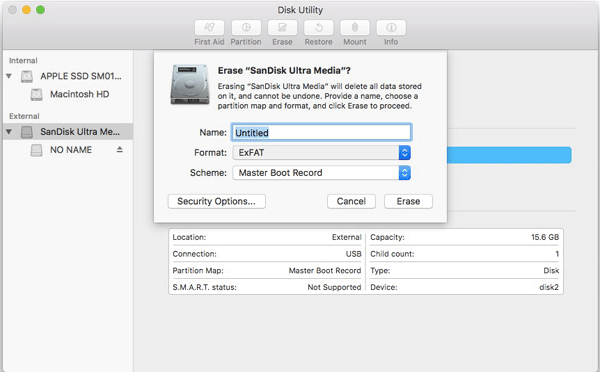
Among these, we believe that ExFAT is the most appropriate File System for a USB drive. It offers complete support for Mac and other platforms. By the way, if you are planning to use the drive for backups — you will be having a big-enough USB Drive, we suppose —, you can go for Mac OS X Extended.
Step 5.3
Now, you need to select the partition scheme from the three available options — GUID Partition Map, MBR and APM.
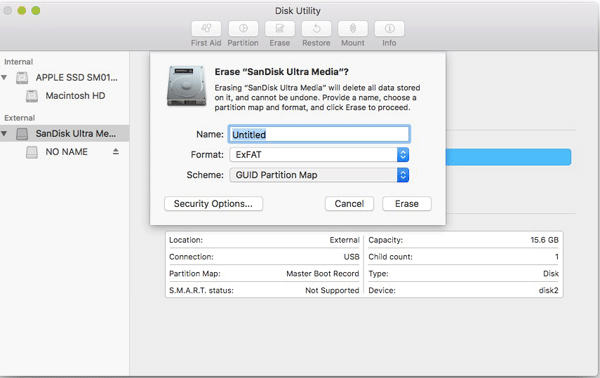
You can choose either GUID Partition Map or MBR if you want Windows compatibility. APM is exclusive for Apple devices, and it can be a problem at times. So, make sure that you make the right choice.
There is also an option named Security Options. In that window, you can select the appropriate ratio of security and speed. It’s an optional feature. So, if you have provided the above-mentioned features, it’s the time to hit the Erase button.
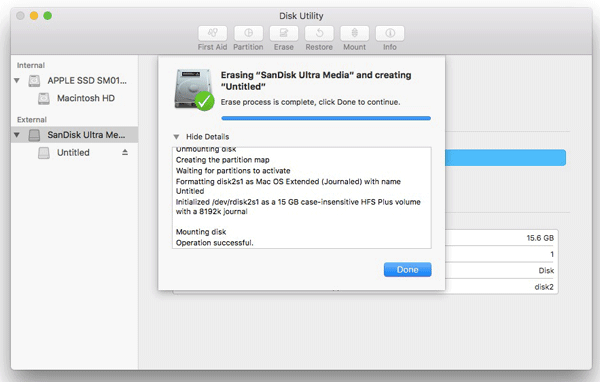
Final Step
Yeah, that’s about it. You have, in a matter of a few minutes, have erased and formatted a USB Drive on your Mac. We hope that was easier than expected.
Wrapping Up – How to Format USB on Mac
We believe this is a comprehensive guide on how to erase and format USB drives on your Mac. We’ve tried to cover almost all the sections and to clear your possible doubts. The only decisions that you need to take are the File System and Partition Scheme. Except those two, everything goes like clockwork. Have any other doubts while formatting your USB drive? Do let us know through your comments.

Suraj Padmasali
Will I recover my hard drive if I broke the encryption algorithm with terminal?
Mahesh Dabade
Yes, data recovery will salvage files removed due to decrypting the hard disk drive. Hope this help!
Debadeep Biswas
Hello Abhijith,
After upgrading from Windows to Mac I was confused with the interface and how to format USB drive. Finally here is the solution. I hope I will get more Mac related articles right here in future.
Thank you so much.