

What do you do if you have issues with your Windows 10 Start menu not working? You press the Windows Start button, but find the Windows 10 Start bar not working? What if Cortana is not behaving? This is not uncommon, and many others have the same problem that you have: whether the Windows 10 Start bar is not working or the keyboard Windows button is not working Windows 10.
Please note that Cortana is not available in all countries or geographical areas. If your problem is with Cortana then check that out first. Make sure it should be available in your geographical area.
Start Menu and Button Not Working in Windows 10
Table of Contents
We have several fixes for this, and which works for you will depend upon the reason for the Windows 10 Start menu not working. Before trying any of these, first, make sure you don’t screw up your Windows system. Create a System Restore Point that will return your system to its original position should anything go wrong.
There are several potential reasons for your Windows 10 Start menu not working as it should. We shall provide with fixes for each of these, but if they fail to work for you, then contact us for further help. An obvious thing to do is to log out of your account and log in again. To do this:
Press the Ctrl + Alt + Del keys at the same time. At one time this would have rebooted your computer. With Windows 10 it gives you a number of options – click on Sign Out. Then sign in again. That sometimes fixes the problem. If not, then you can try any of those below.
1. First of All Check for Updates

There may be Windows updates available that will quickly resolve your problem. It’s easy to find out: Press the Windows key + R. You will get the Run window. Type in ‘ms-settings’ and then click OK.
You are now in Settings – select Update & security > Windows Update, and then select Check for updates.
If there any updates available you will see them. If so select the update. Install it then restart your computer and check the Start Menu. If it is now running as it should, then job done! If not, here are some other ways to resolve this problem.
2. Do You Use Dropbox?
Some users of Windows have found that using Dropbox can lead to issues with their Windows button not working. It’s not a universal issue, and most run Windows 10 and Dropbox without a problem. However, because it is known to lead to Start Menu problems it would be wise to eliminate this as the problem first before resorting to the potential fixes below.
There is little point in going through all our suggestions only to find that Dropbox was the problem all along. So uninstall Dropbox and then restart your computer. Check the Start Menu, and if that is now running as it should, then you know the cause of your problem. If the issue persists then go through each of the recommended fixes below. Once it has been cured, reinstall Dropbox.
To Uninstall Dropbox, press the Windows logo key + R at the same time. Enter ‘control‘ into the search window and press OK.
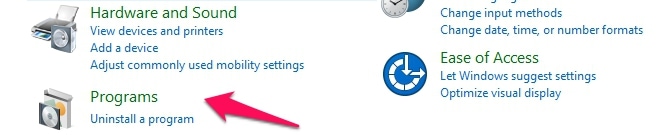
You will then see the menu to the above right. Click on ‘Uninstall a Program‘, look for Dropbox in the list then click to uninstall it. Restart and test the Start button. If this doesn’t resolve the issue then continue as below.
3. Create a New User Account
- Right-click the taskbar on your desktop at the bottom and click Task Manager:

- Now click on the File link then choose Run new task:

- Then type Powershell and tick the box for “Create this task with administrative privileges”. Click OK.

- You should now be in the Powershell Window:

- Type the following after the command prompt:
net user newusername newpassword /add
- Then press the Enter key on your keyboard. You can set the ‘username’ and the ‘password’ to what you want.
- Now restart your device/computer and login with your new details.


This should normally get your Start Menu working. Keep in mind that you have created a ‘local’ account and that you must now change that to a regular Microsoft account. Then you must transfer your settings and all the files you want to retain to that account.
4. Check Your Third-party Antivirus Programs
Microsoft offers its own antivirus software and anti-malware applications. If you have also installed third-party software such as Norton, MacAfee, Kaspersky or any others, then these can lead to problems with your Windows 10 Start menu not working. Try switching the application off. Disable it, and then restart your computer. You may find that your Start Menu works as normal.
If it does so, then you are highly recommended to contact the vendor of the software and explain the issue with your Start menu not working Windows 10 correctly. They may be able to help with tweaks or a version more suitable to your OS or Windows version.
5. Repair Windows Files
If your Start Menu refuses to work properly, then there are other methods you can use to resolve the problem. The issue might be connected with corrupted Windows files. The next method involves repairing these files.
- Accessing Windows Powershell as above – steps 1-3.
- Type the following after the command prompt: sfc /scannow
- Then press the Enter key on your keyboard. Wait until the process has 100% completed. If you then see the message ‘Windows Resource Protection did not find any integrity violations’ then your file system is OK. You should then move on to the next method below.
- If you don’t get that message then enter the following after the new command prompt:
DISM /Online /Cleanup-Image /RestoreHealth
This may take some time to execute. Once it finishes, check your Start Menu.
6. Reinstall Your Sound Card and Video Card Drivers
It is possible for your Sound Card and/or Video Card Drivers to be responsible. After the most recent Windows update, many people found their Windows 10 Start menu not working. You may be able to overcome this problem by reinstalling these drivers. Some people have got their Start menu back working again after doing this.
- First, press your Windows key and the letter X on your keyboard at the same time – or even simpler, right-click with your cursor on the Windows logo to the far left on your taskbar at the bottom of your screen. Now click on ‘Device Manager’ on the pop-up menu and look for ‘Display Adaptors’. Click on that text and you will see the adapter you have. For example:

- Now click on the device name (in this case the Intel (R) graphics card) and you should see this screen:

- Click on ‘Update Driver’ then retest to see if this has solved your problem.


If not, then you will have to uninstall your driver and reinstall it with the new version. To do this:
- Do as you did to get your Display Adaptors link, then scan down to ‘Sound, video and game controllers’. Right click on the audio card driver displayed, then click on ‘Uninstall device’. Follow the instructions given to uninstall your driver software.
- Now restart your computer. You will now need to update the video and sound card driver. If you know what you are doing, you can do this manually. If so, you must go to the computer manufacturer’s website, particularly if you use a laptop. Check for the correct drivers for your device.
- If you are unsure of being able to do this, then go to DriverEasy. This site checks your computer for the correct drivers for the system installed. It downloads the proper drivers for the video and audio card installed on your computer. You can get DriverEasy here Simply click to save it then run it.
- Click the ‘Scan Now’ button. DriverEasy will then run to find any driver issues on your installation.
If you want to simply update all the drivers on your installation, which may be the simplest solution for you, then you will need the Pro version of DriverEasy.
7. Microsoft Start Menu Troubleshooter
Microsoft is not unaware of the potential issues with the Start menu not working problem, particularly after the introduction of the Creators update of April and October of 2017, known as Redstone 2 and Redstone 3. The Spring update has been delayed, and Microsoft is sure to be aware of specific problems associated with the Creators update.
Otherwise, why else would it have published the Microsoft Start Menu Troubleshooter?
Simply click on the link to activate it. It will check the installation of the Start Menu and Cortana to ensure that they have been carried out correctly. The troubleshooter tests whether or not the registry key permissions are properly in place, and also checks for any corruptions in the databases and other critical areas of the files and registry.
Install the troubleshooter from the link above, and then establish whether or not it resolves your problem. If not, then you have to move on to our suggestions below.
8. Check Windows Files and Then Repair Them – Reinstall Cortana
Go to the Powershell window as in the #1 section above. This is the same window you used to create a New User Account and to repair Windows files. Task manager -> Run New Task -> Powershell . You will then see the command prompt, but in this case, enter the following text:
Get-AppXPackage -Name Microsoft.Windows.Cortana | Foreach {Add-AppxPackage -DisableDevelopmentMode -Register "$($_.InstallLocation)\AppXManifest.xml"}If Cortana and your Start Menu are still not working correctly, then we need to try something different. Instead of the coding above, enter the following after the command prompt:
Get-AppXPackage -AllUsers | Foreach {Add-AppxPackage -DisableDevelopmentMode -Register "$($_.InstallLocation)\AppXManifest.xml"}This should get your computer working as it should. Restart your computer and should see the Start Menu working properly now. But what if it isn’t?
9. If all Fails Edit the Windows Registry
If you have tried the above and you still have issues, then this tip may help. If the Windows Start button is not working on Windows 10, and you cannot get the Run command to come up after clicking the Windows button, then press CTRL+ALT+DEL to access the Task Manager. Then:
- Click on File at the top left of the task manager:

- Click on ‘Run New Task’.

- Then type regedit into the window that appears (labeled ‘Open’) then click on OK.

- If you are asked if you want to continue then click OK.
- Follow
HKEY_LOCAL_MACHINE\SYSTEM\CurrentControlSet\Services\WpnUserService

- Double click on ‘Start’ to the right of the screen.
- With ‘Base’ set on ‘Hexadecimal’ change the value data to “4”.

- Now click OK.
- Reboot the computer.


Many people have reported this to work for them when everything they had tried had failed. With their Windows 10 start bar not working, many tried this final fix and reported that it worked for them. If your Windows 10 start button is not working, then one of these fixes above will likely solve the problem.
Windows 10 Start Menu Not Working: Conclusion
If your Windows 10 Start menu will not open, then there are steps you can take to correct it. We have covered the main reasons of your Windows 10 Start menu not working and solutions that have proved to resolve this issue. Work through them in order, and you are practically certain to find the solution that works for you.
Tim Burton
None of that worked for me. I thought for sure the registry trick would do it. Any more ideas?
Stan Walters
There may be a simpler answer – go to Personalisation – Start – and turn off Use Start Full Screen
Mark Swarbrick
Stan, you are a genius. I tried all recommended things – I did what you said. It was already off, but I turned it on and back off and that fixed it! Thanks!
Stan
Pin to Start doesn’t work anymore with Windows Edge. You can pin websites to start using Chrome Browser. Here’s how.
1. Pull up the website with Chrome.
2. Click on settings in the right-hand corner of the window.
3. Click shortcut.
4. When the shortcut appears on the Desktop, Right click on the shortcut, pin to start appears, and click.
5. The icon appears on the start menu. Use as you wish, put it in a folder just like you did with Edge.
6. Go back and delete the icon from the desktop if you prefer.
7. Edge is the problem, not Windows 10!
Krishnan
Really helpful. Thank you so much !!!!
The one with uninstalling the third-party anti-virus software worked (I had installed Avast previously)
This article was literally a lifesaver! Keep up the good work!
Abhijit
Creating the second user is not an acceptable solution on a work-issued laptop.