

In our previous tutorial, we showed you how to deploy a simple PHP web page on Heroku which involved setting up the Heroku toolbelt, configuring it, and deployment. In this tutorial, we will be hosting a WordPress blog on Heroku. It will require the same procedure involved in setting up the PHP application, along with it we will be configuring our application to work with a database, which is also provided by Heroku known as Heroku Postgres (database as a service).
Note: This tutorial does not show how to migrate your existing blog to Heroku.
Heroku provides a free 5 MB database, which should be enough to get started with WordPress. If you are looking for more space for your database please refer to the Heroku Pricing plans.
Here will be using a custom built of WordPress, which is available here. It comes built with PostgreSQL for WordPress and WordPress Read-only. Since Heroku does not provide MySQL, will be using PostgreSQL as our DB. (Also, Heroku does not provide write access on the file system, will be using a WordPress Read-only built).
Let’s start by cloning the custom build of WordPress using Git. Please refer to using Git on Windows for more information on how to use Git. Clone the repository as `wordpress-heroku`, or download the repository from https://github.com/bkvirendra/wordpress-heroku/archive/master.zip
$ git clone git@github.com:bkvirendra/wordpress-heroku.gitChange your current directory to `wordpress-heroku`-
$ cd wordpress-herokuNow create a Heroku app using:
$ heroku create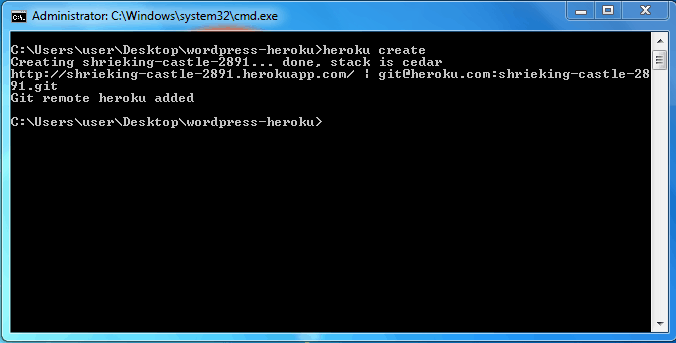
This will create a Heroku app using the cedar stack, and will return the name and URL of the app created. Here the name of the app created is `fierce-wildwood-8395`.
It will automatically add the Git remote, you can verify that using –
$ git remote -v
>> heroku git@heroku.com:shrieking-castle-2891.git (fetch)
>> heroku git@heroku.com:shrieking-castle-2891.git (push)
Now you need to add the database add-on to your app, this can be done using:
$ heroku addons:add heroku-postgresql:dev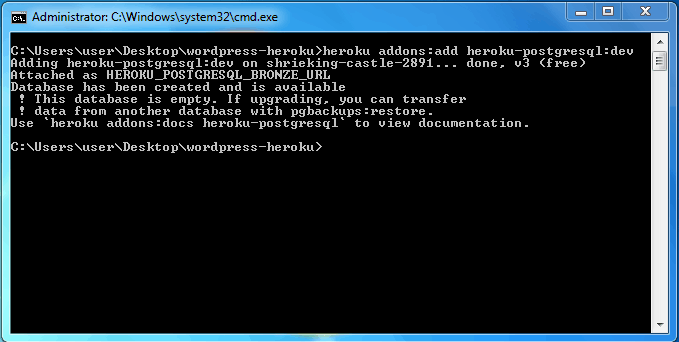
It will return the attached as color name, (in the above output the color name is `HEROKU_POSTGRESQL_RED_URL`)
Now promote the database attached to the app. (replace the HEROKU_POSTGRESQL_COLOR_NAME with the color name you get from the previous step).
$ heroku pg:promote HEROKU_POSTGRESQL_COLOR_NAME –app APP_NAME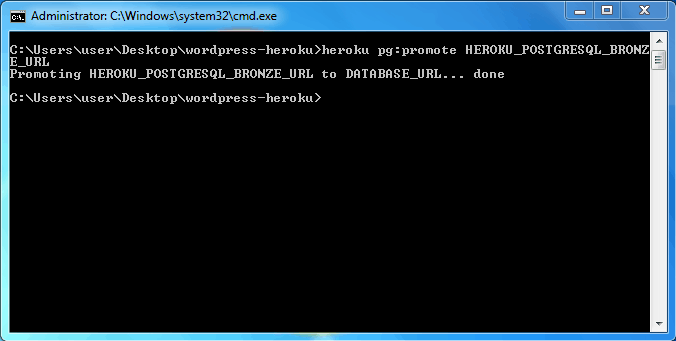
Now edit the `wp-config.php` file and update the unique keys and salts on lines 48-55. You can get the random values at here.
define('AUTH_KEY', 'put your unique phrase here');
define('SECURE_AUTH_KEY', 'put your unique phrase here');
define('LOGGED_IN_KEY', 'put your unique phrase here');
define('NONCE_KEY', 'put your unique phrase here');
define('AUTH_SALT', 'put your unique phrase here');
define('SECURE_AUTH_SALT', 'put your unique phrase here');
define('LOGGED_IN_SALT', 'put your unique phrase here');
define('NONCE_SALT', 'put your unique phrase here');
Commit the files.
$ git add .
$ git commit -m "first wordpress commit"
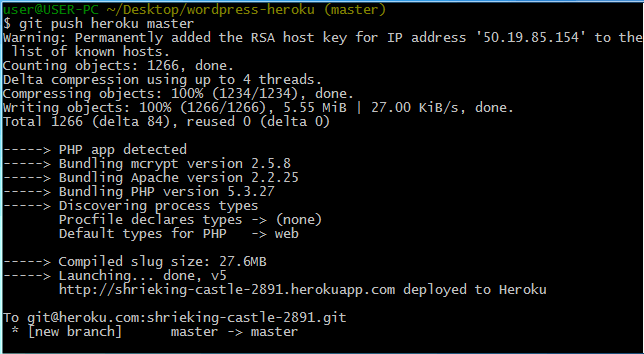
$ git push heroku masterAnd you’re WordPress blog will be deployed. You can visit the sample blog created at http://shrieking-castle-2891.herokuapp.com/
After deployment, WordPress will ask you to set up your site title, username, and password. And that’s all.
Please note that, since Heroku does not provide write access to the file system, all the plugin installations and updates have to be made locally, and then pushed to Heroku. Please refer to this wiki for more information on setting up the local environment, database syncing, and media uploads.
If you’re facing any problems deploying WordPress on Heroku let us know in the form of comments below. Don’t forget to share this article with your friends on Facebook and X.
Robert
Virendra, thank you for yor explain how to deploy WordPress on Heroku. I was looking for this a few days! :-)
Well done.
Nhick
Very informative, I just hope I can properly implement this on my next project..
Thanks,
Nhick
Eody
Thank you for nice blog.
I have a problem. I deployed succesfuly a existing wordpress website to heroku, so I don’t want to run wordpres install again. But at the first time I accessed to mywebname.herokuapp.com, it lets me reinstall wordpress agian.
How to fix this ?