

Last week we kicked off our Linux Hands-On series to create a structured series that informs and educates the reader about what Linux is, how it works, and at the same time, making sure they get their hands dirty by trying out terminal commands.
As mentioned in the first part of the series, the entire series is going to be a logical progression each week. That means that this part is only going to make sense if you have either gone through the first part and tried all the commands or if you have the basic knowledge about Linux and can get your way around it. If you aren’t familiar with these concepts, make sure you read the first part, and then you can jump right in.
In this week’s post, we’ll build on top of what we covered in the previous post and tell you how you can do some more complicated things. If you’ve had questions like how to edit files in Linux? How to view a process in Linux etc. this post will answer those. So without wasting any more time, let’s get straight to the commands.
We’ll divide the commands into sections so that it makes sense to go through them one by one.
What Will You Learn
- File Handling
- Pattern Matching
- Process: Viewing and Killing
- Editing Text Files
Alright, so now that we have a basic structure laid out, let’s go through them one by one.
In the previous post, you got to learn how to create files in Linux and how to remove them. Let’s build on top of that and first see how to view the contents of a file.
cat Command
In order to view the contents of a file, we use the cat command. The textbook definition of this command is that – cat command sequentially reads a file and prints the output to the standard output. In simple terms, it means that the file prints out the contents of a file line by line.
Let’s use an example to see how does the cat command work shall we?
Here’s the syntax:
cat FILENAME
Replace the FILENAME with one of your own. As you can see below the command just printed out the content of the files ghost.txt in a line by line format:

Now that we know how to view the contents of a file let’s learn how to actually add contents to a file right from the terminal, without using any editors (don’t worry that’s gonna come very soon).
Redirection Operators in Linux
One of the ways in which you can add (overwrite or append) contents to a file is by using one of the redirection operators. In simple terms, the redirection operators allow users to control the input and output of a command.
Of that blew past your head, here’s a more relatable example. Remember what the echo command did? It printed out a string to the terminal. The string was the output of the echo command. By using one of the redirection operators you can actually use that output and wrote it to a file.
Enough talk, let’s see how does the redirection operator works with an example.
Here’s the syntax for the redirection operator:
command redirection_operator file
Here, the command is the terminal command that will output a string and the file is the actual file that will accept that output. There are several redirection operators available but let’s limit our scope to writing to files.
To do so we can use one of two redirection operators, i.e., > and >>
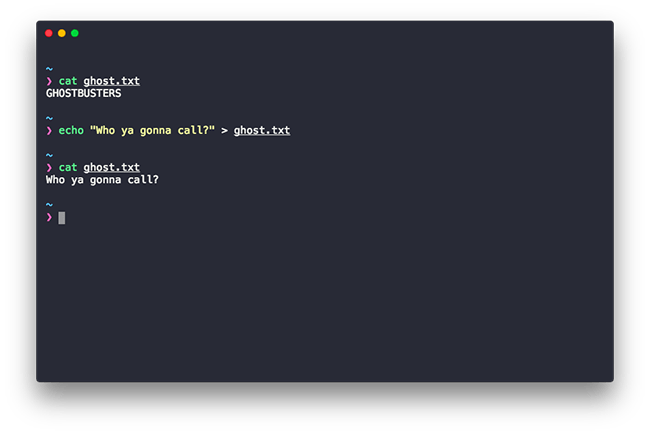
In the following screenshot, you can see how it works. I’ve shown in the terminal that the file is initially empty using the cat command, then I added contents to the file using the echo command and finally printed out the contents using the cat command.
The > operator works in the overwrite mode. This means that if you use the > operator to write content to a file, its previous contents will be overwritten. This is shown in the screenshot below. As you can see the previous contents were replaced by the new one.
Now the obvious question is what if you don’t want to replace the existing content? Well, there’s a version of the redirection operator that does just that.
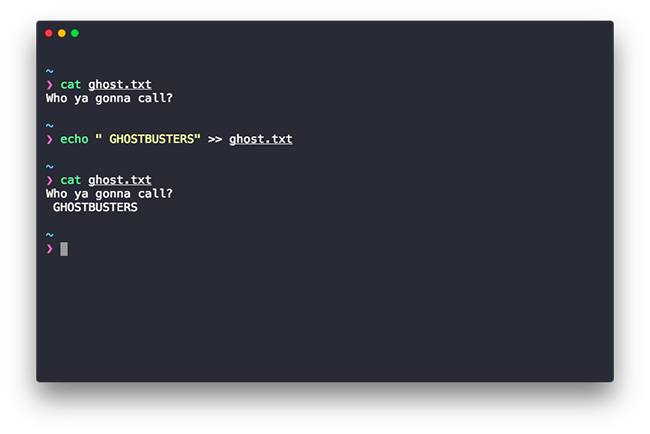
In order to append to a file, instead of using the > we use >>
Here’s the syntax:
command >> filename
And you can see an example usage in the screenshot below, the content was appended to. Pretty neat right? Agreed it doesn’t offer the same flexibility as a text editor but for smaller use cases it gets the job done pretty well.
Alrighty moving along!
Now that we know how to add contents to a file and how to view them, how about learning how to find files in the file system?
find Command
In order to search for files inside your filesystem, we use the find command. The command does basically what it claims to do. It finds a given filename or a regex pattern.
The basic syntax for the same would be as follows:
find path -name expression
As always replace the placeholders with your own values.
The path tells the find command which directory to search the given file for. The name option specifies a pattern that the search needs to be matched against.
Let’s see how does the find command work in a sample usage.
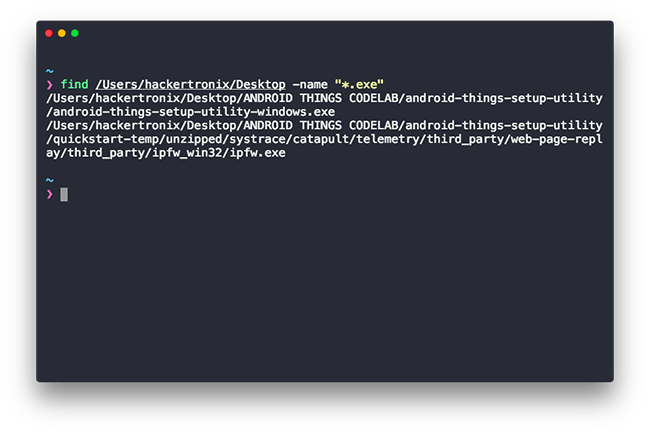
As seen below in the sample output, the command looks for any .exe files within my filesystem and outputs it to the console.Now that we have some of the more complex manipulation commands under our belt, let’s go a step further.
We will now take a look at how we can search for stuff within a file.
grep Command
grep stands for Global Regular Expression and while we will cover that in a future post, the basic explanation for what it means is, that it’s just a template that grep uses to check the strings against to find a match. Don’t worry if it doesn’t make much sense. We’ll cover it extensively in Part 3.
Alright so let’s test out grep. Here’s the syntax of our test:
grep -i "string to match" filename.extension
The – i option will tell grep to ignore case so “HO” “ho” and “hO” will be considered the same. The string to match against is specified under quotes which are then followed by the filename.
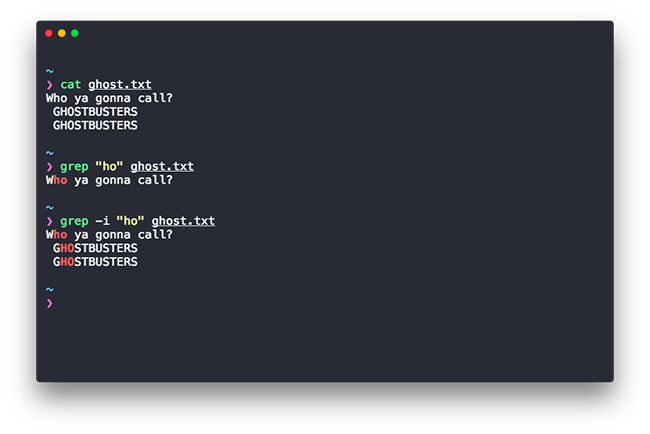
Alright, let’s see how the grep command in a demo.As seen above my example shows the usage of grep in both case-sensitive modes and in non-case-sensitive mode.
It’s worth noting at this point that there n different combinations for a command and several options to go with it. What I’m doing here is giving you a general rounded off use case which will work for most simple cases but in case you want to go all in you can definitely do a man on the command to figure out all available options to use with the command.
Next, let’s see how we can actually compare 2 different files in a line by line manner.
diff Command
In order to see how 2 files differ (get it?) we use the diff command. It’s better to see it in action to understand how it actually works so let’s get right in.
Here’s the syntax for the diff command:
diff file1 file2
And here’s an example usage of the diff Linux command:
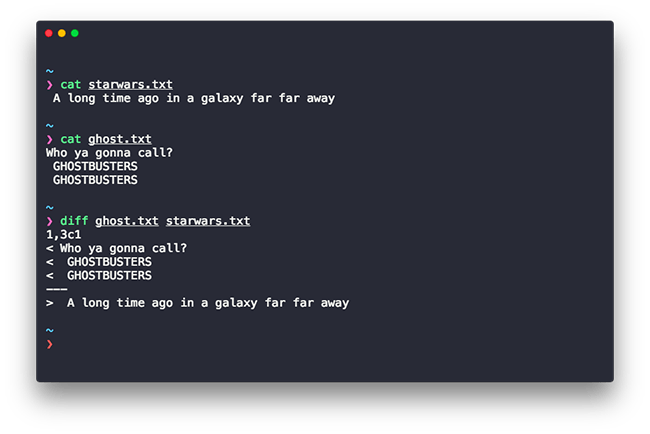
At first glance it may not make complete sense, so let’s break the output down.
The first line of the diff output will contain:
- line numbers corresponding to the first file
- a letter (a for add, c for change, or d for delete)
- line numbers corresponding to the second file.
In our output above, “1,3c1” means: “Lines 1 through 3 in the first file needs to be changed to match lines 1 in the second file.” It then tells us what those lines are in each file:
- Lines preceded by a < are lines from the first file
- Lines preceded by > are lines from the second file.
Moving on, we’re gonna see how we can find out about repeated lines in a given file.
uniq Command
The uniq command is used to find out the repeated lines along with their count and other similar details. If you man it, it says its used to filter out or report repeated lines in a file. As with almost all commands, the uniq command also has a bunch of options to go along with it.
But for the sake of brevity and to make sure you learn a greater number of commands instead of learning too much about a single command, we will just draw out a minimal example, and you can dig in more using the man command.
Alright, here’s the syntax for the uniq command:
uniq -options filename
Now let’s see a sample to learn how does the uniq command in Linux work.
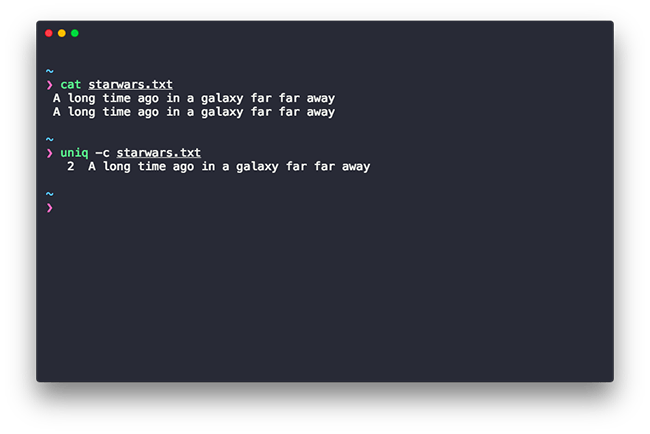
Let’s break down the sample real quick. The -c option tells the uniq command to print out a count along with the output and the next option is the filename that is supplied to uniq.
As you can see in the example above, it printed out the count of the repeated lines which in our case was 2.
That should do it for all the commands you need to know to make sure that you are able to work around files, but there’s one very important part that we didn’t cover till now and it’s around access rights.
You see in the real world, you don’t want all your files to have a global read-write access meaning anyone can just walk and make edits to a file. Certain files need to be protected from tampering. That’s where access control comes in, and Linux and Unix both manage it surprisingly well with this next command.
chmod Command
The chmod command stands for change mode and it basically allows you to alter the way a file can be accessed and who can it be accessed by.
The syntax for chmod is fairly simple and it looks like this:
chmod -options permissions filename
While options and filename don’t need elaboration, the permissions part does need some explanation.
File permissions in Linux revolve around 3 scopes, user, group, and others. Permissions are in turn of 3 types read, write, and execute. Meaning each scope has 3 permission making a total of 3 sets of scopes with 3 permissions in each.
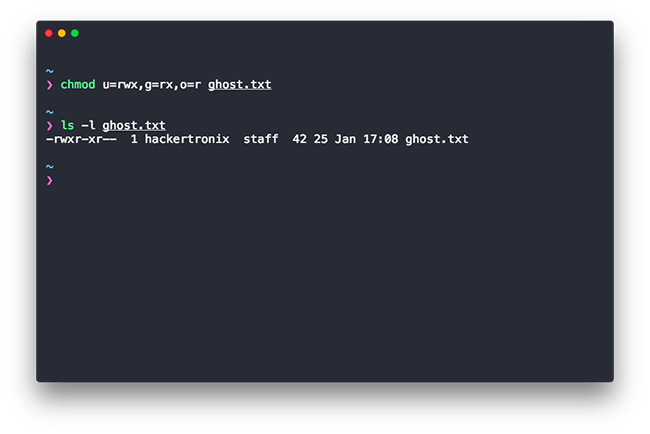
Having that in mind here’s a sample usage to show you how chmod works:
chmod u=rwx, g=rx, o=r filename.txt
Here u stands for user, g for group and o for others. And the = sign is used to assign the permission read (r), write (w), and execute (x) to each scope. The comma separates each assignment.
There’s a shorthand for assigning the permissions and it’s using the octal notation. In the octal notation:
- 4 stands for read
- 2 stands for write
- 1 stands for execute
- 0 stands for no permission
So according to the above notation the number 7 will grant read write and execute permission (4+2+1). You can mix and match it accordingly and here’s a sample use case using the octal notation:
chmod 755 starwars.txt
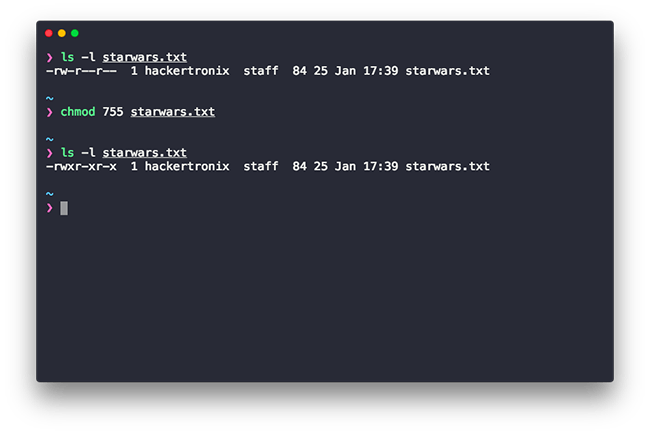
In this sample, the file starwars has:
- read, write and execute permission for the user.
- read and execute for the group.
- execute others.
Alright! we’re nearing the end of the file handling part of the post. This final command will allow you to archive a file/compress a file. Archiving a file comes in handy when you want to move around a bunch of files across systems while making sure you avoid corrupting them.
tar Command
The tar command stands for tape archive and it allows you to create manipulate and extract the archived files.
Here’s the basic syntax of the command to see how it works:
tar -options filename1 filename1 …. filenameN
Let’s see a sample usage with a couple of options. It’s highly encouraged that you play around with the sample and then explore it for yourself to uncover more interesting use cases.
tar -c -f compressed.zip ghost.txt starwars.txt
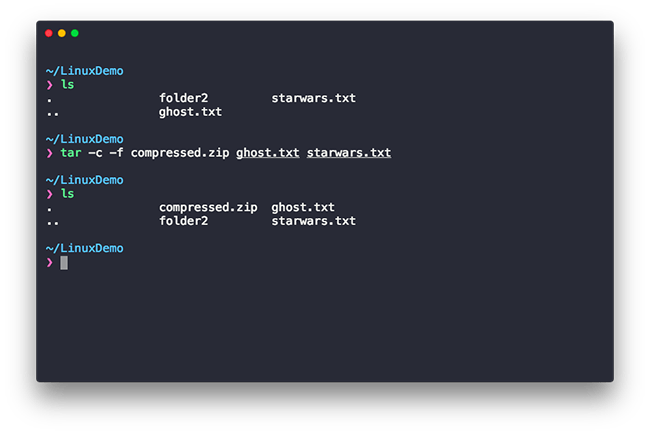
Let’s break it down. The -c and -f commands are just a few among a list of many but here’s what they do. The -c option tells the command to create a new archive and -f is used to specify the filename for the archive which in this case is compressed.zip, the tar command can create archives in .zip, .tar, .rar and other formats so make sure you choose one which fits your needs
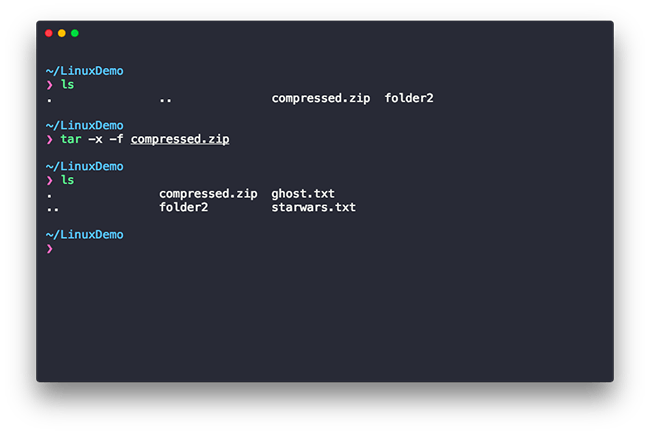
Now that you know how to compress files, let’s see how to extract them. We use the -x and -f options on the tar command to extract a file, the -x option tells tar to extract the file and -f is used to specify the filename as shown in the example below:
Alright, we’re finally past the file handling part of the post. Hurray! You did a great job coming this far. We’re gonna talk about processes now.
In the Linux terminology, a process is a program currently in execution, carrying out a specific task. Processes are dynamic and constantly change as the user switches between applications.
The Linux documentation talks about processes in great detail and I encourage you to take a read once you are done with this post.
Now that we know what a process is let’s see how to view them.
ps Command
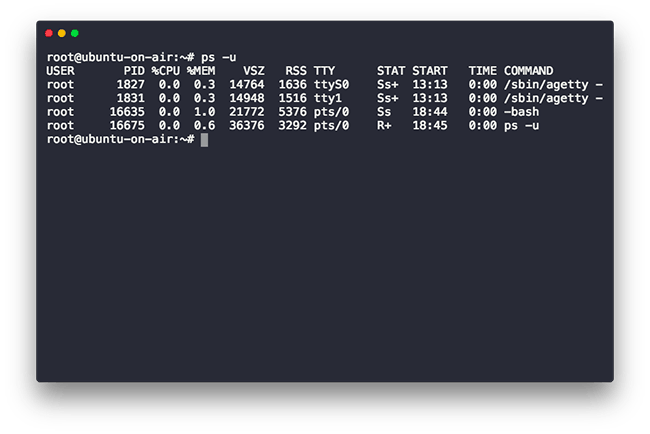
The ps command lets us see what processes are currently executing on a machine. It comes with a variety of options but here’s a minimal usage which shows all processes currently running as root.
The syntax is as follows
ps -option
In our case, we will use the -u option which will show the processes running as root.
Now that you know how to view processes, how about learning how to kill them?
kill Command
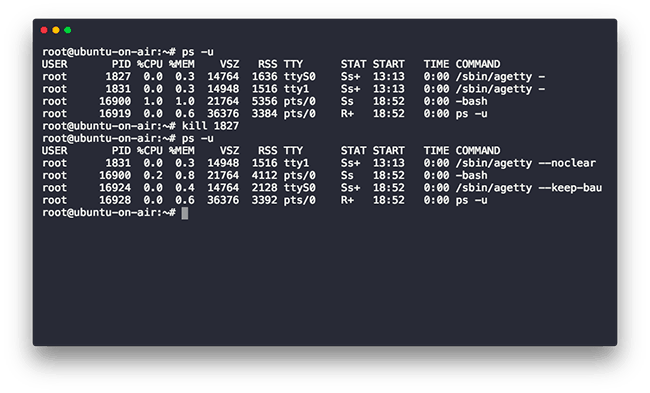
The kill command is used to kill or terminate a given process without logging out or rebooting the computer. It’s worth noting that the kill command doesn’t actually kill a process, it only sends a signal to a process and the signal tells the process what is to be done. By default when no signal is specified a signal 15 called SIGTERM is sent to the process and if this fails a stronger signal 9 SIGKILL is sent to the process, however for most normal use cases all you need to specify to kill a process is it’s PID.
Here’s the syntax for the kill command:
kill [signal or options] PIDs
And here’s a demo:
Be very careful while killing a process. Killing a system critical process may make your machine behave abnormally. If you still, however, manage to do so, make sure you reboot your system once to restore its normal execution.
Alright, now that we’ve covered some grounds with the terminal commands, let’s talk about an easy way of making changes/adding contents to a file. We all use text editors like Visual Studio Code or Atom but since the aim of this series is to get you all comfy and cozy with the terminal, why not explore a basic editor within the terminal itself?
nano Command
Nano (trust me) stands for Nano’s ANOther editor and it is a free, lightweight and open source editor that allows you to edit files within the terminal is a native text editor like environment with the usual commands you are familiar with.
To invoke nano/open a file in nano you type in the command in the following syntax:
nano FILENAME
If the file exists, nano would open it and in case it doesn’t it would create a new file with that name and open it. The editor in itself fairly minimal and unlike its elder (and hated) sibling Vim/Vi it doesn’t drive you crazy with the notoriously difficult commands. To navigate within the file you use the usual arrow keys. To remove content you still use the delete/backspace key and to handle your clipboard you use the familiar Ctrl+C, Ctrl+V etc.
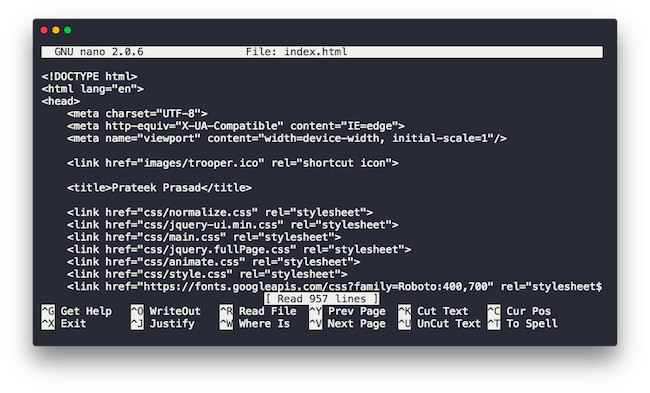
The editor lays out most used operations like exiting the editor out for you on the bottom half of the screen. Before quitting using Ctrl+X you will be prompted to save the changes you made. Sure Vim has been around longer but in my personal opinion, it’s nothing more than a pass to the hippy culture. The most you can get out of being a pro at Vim would be pulling off a brag, and it ends there itself. There’s absolutely no reason one should waste their precious time learning how to use Vim. That being said we have finally reached the end of Part 2.
Linux Commands for Intermediate Users: Summary
In Part 2 of the Linux Hands On series, we built on top of the foundation that we laid in Part 1. We got around handling files and manipulating them. We also learned a whole new concept called processes and how to kill them. And we closed this part off with an overview of the Nano text editor. That would be all for this week. Until we return the next week with Part 3 make sure you give yourself enough time to play with the command shared in this post. Don’t be overwhelmed by the number of commands out there, it takes a long time to have these things become muscle memory. Till that happens, hands-on experience is your best friend.
Manas Chaudhary
Thank you for these Linux series. I have gone through this fully and I found it really helpful. Especially videos. Sometimes it is hard to follow article so I downloaded the video and learn it. Now I feel I know a good amount of Linux to start doing something in it. Thank you for these posts helped me very much.
Md Belal Hossain
It’s a really helpful post, Especially videos. I think a good amount of Linux to start doing something in it. I have must say thanks to admin for sharing kind of this nice articles with us and I Hope We will also get more information from you.
Manoj Kumar
Nice this really an informative article ..!