

Over the past decade, Linux has grown from an alternative operating system for enthusiasts into an essential tool for powering some of the most robust software infrastructures in the world.
With the breadth of such services expanding every day, demand for people who are proficient in administrating these systems has also increased. With the Linux Hands On series, we’re trying to get a few steps closer to the journey of getting to that level.
Since the past two weeks, we’ve been covering the Linux terminal from the ground up. We started off with the basic Linux commands and Linux installation on a virtual machine in the first part and then we built on top of that with the intermediate Linux commands and a brief intro about Linux processes and how to view and kill them in the second part.
For this week, we’re finally going to step up our game!
What Will You Learn
- Boosting productivity with command aliasing
- Checking disk usage based on volumes and file types
- Downloading files over the network
- Network Troubleshooting basics
- Services and how to manage them
- User access control/session management
- Shutting down and rebooting the system
This week we will cover the advanced terminal commands. These commands revolve around stuff which you will need most of the times during system administration, we also have a couple of commands that will help you reduce your turnaround time and increase your productivity.
1. Command Aliases
So the very first point we’re gonna cover is aliases and this going to hit the productivity part of the post. Ever so often you’ll find yourself repeating certainly command from time to time. In these situations, the command history technique which I covered in the first part. Command history will notice actually help you save the time by avoiding to type the command, it gets compensated for when you scroll. Using command alias you can avoid all of this hassle. Aliasing comes in handy when you are dealing with commands that are especially hard to type and when you aren’t using an autocomplete plugin on your terminal.
Before creating aliases let’s see how to list them. An alias (in context of Linux terminal) is a shorthand for a traditional terminal command. This is not however exclusive to Linux terminal commands only. You can alias almost any command imaginable.
Here’s an example. For committing to a git repo we use git commit with the -m flag. On an average let’s say you use this command at least 10 to 20 times a week. Typing the entire thing makes no sense, this is where aliasing comes to play. By using an alias like let’s say gitcmt you save yourself the trouble of typing the whole thing. Add this saving over a couple of months and years and you’ve got yourself a few extra hours. Blows your mind doesn’t it?
Alright, let’s see how to check for and create aliases.
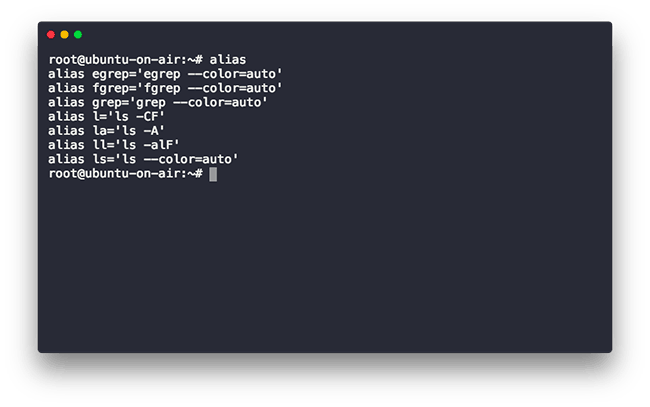
In order to list the already existing aliases, you just issue the alias command without any flags and hit enter. And the list of aliases will be returned to you.
These aliases are mostly system level global aliases which apply to all users of the system.
Now that we know how to see all aliases on a system let’s go ahead and create one.
To create an alias here’s the syntax.
alias ALIASNAME="ACTUAL_COMMAND_NAME"
So in our case what we’re gonna do is have an alias for the echo command just for demonstration purpose.
Just type the following and hit enter.
alias ec="echo"
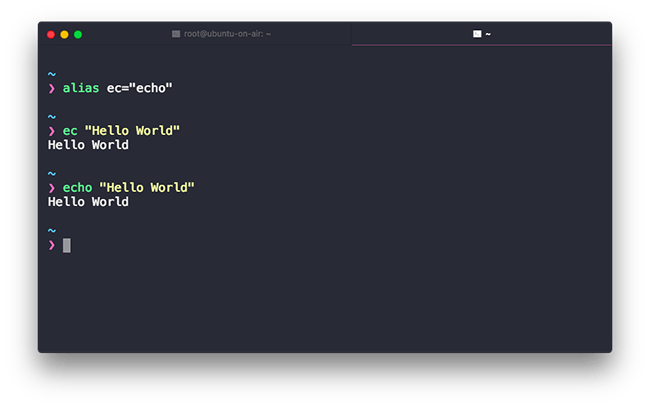
Now instead of using echo, we can simply type ec instead.
Do note however that this alias will only last one session, meaning if you close the terminal and reopen it, it will no longer work. In order to make it permanent you need to edit your shell configuration file which is stored on ~/.bashrc
Open the file in nano, place the command within this file as shown in the screenshot below and exit.

After exiting issue the following command:
source ~/.bashrc
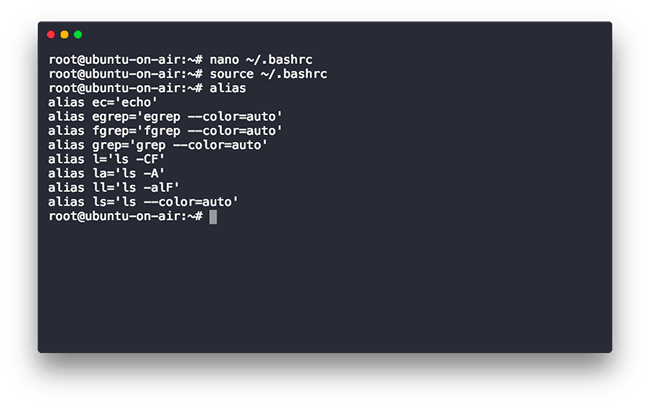
Once this is done your command alias will be permanent.
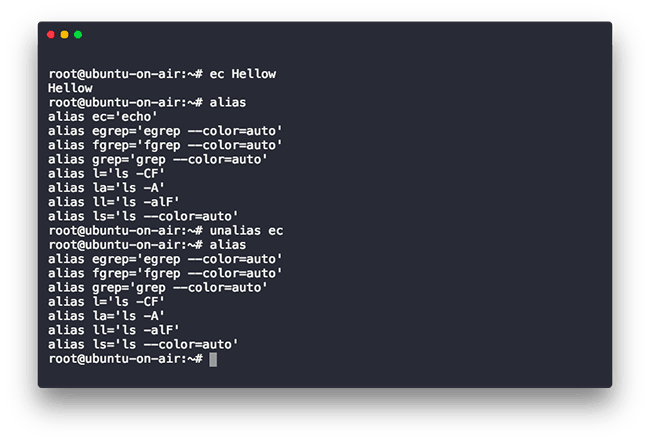
Now let’s check out how you can unalias a command. The opposite effect is achieved by issuing the unalias command
The unalias command will not only remove the alias from the current session but also from the shell configuration file.
2. whereis Command
Often times when people are writing software, they maintain 2 different environments. A development environment which resembles the setup of the production server and a regular local environment which is as per the user’s need. To keep these 2 spaces isolated/separated from each other most people either use something like Docker or vagrant but some people prefer a manual approach as well. If you fall into the latter half, it’s quite likely that you have duplicate binaries or same binaries with different versions on the same machine. This next command helps you list all installations of a particular binary. The command is called whereis and it will list out the location in which a particular binary along with its documentation is stored.
Here’s the syntax for the whereis command:
whereis BINARY_NAME
Now that we’ve seen the syntax let’s see how to use the whereis command:
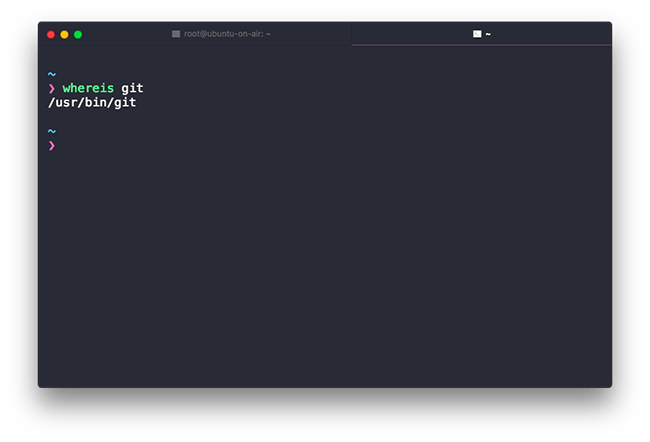
As you can see it listed out the location of the git binary is stored on the system.
This command however simplistic will be of immense help when you run into compatibility issues while building something.
3. service Command
A long-running operation in the background is termed as a service in Linux. The Linux OS comes with a host of services which you can find out by navigating into the /etc/init.d directory. While we cannot cover how to create a custom service as that is out of the scope of this post, a simple search on StackOverflow would definitely guide on how to create one. We will, however, talk about managing services. Which includes starting, stopping restarting and checking the status of the services.
The syntax of service command would be as follows:
service SERVICE_NAME start
For this sample, we’ll be working with the sshd service which is a secure shell server from OpenBSD.
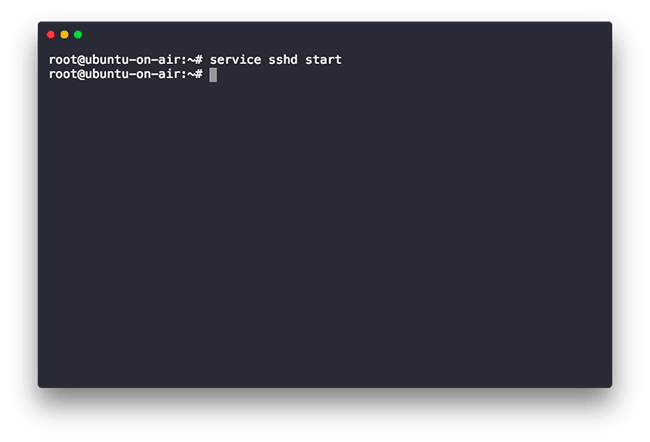
To start a service we use service start followed by the service name (here sshd).
service sshd start
Let’s see it in action below. And if by hitting the enter key nothing shows up on the terminal, it means that it worked successfully.
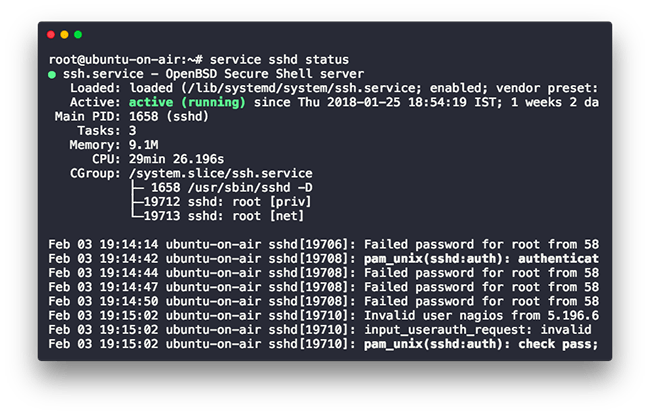
Now let’s check the status of the same service. To do that we’ll be using the status option along with the service command. As seen below.
service sshd status
This would show if the service is active or not along with other helpful details.
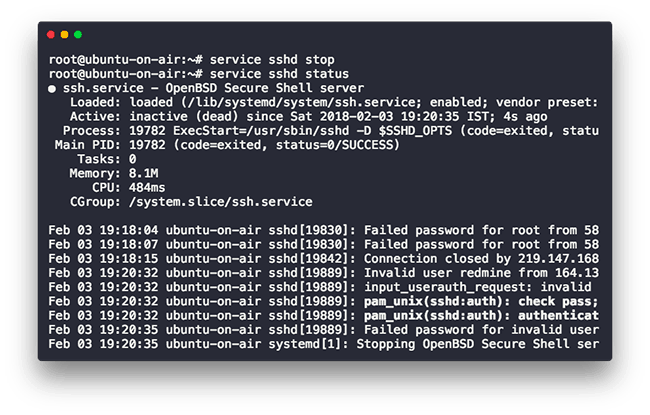
Now that we know how to start a service and to check its status let’s see how we can stop it.
To do so we use the stop option along with the service command. If you check the status now, it will tell you that it’s inactive.
service sshd stop
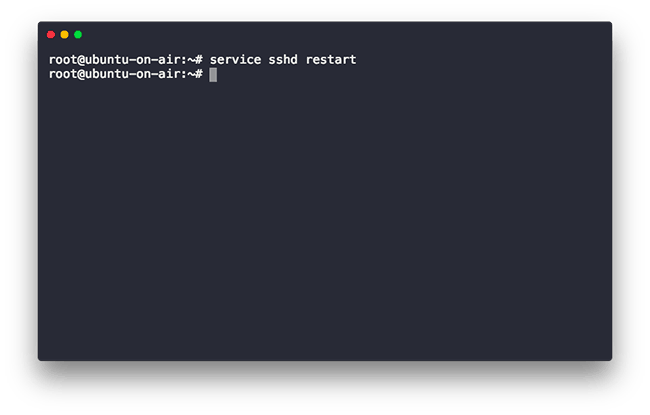
Alright now for the final part, we’re gonna restart the service. And to do so, surprise surprise, we’ll use the restart option.
service sshd restart
Let’s move along.
4. df Command
Since this part of the series is concerned with learning how to administer a Linux system via the terminal, let’s learn one of the most common tasks we perform while using an OS. We’re gonna see how to check the disk space right from the terminal. To do so we’ll use the df command. It stands for disk filesystem and it is used to display the amount of disk space available on a filesystem.
Let’s start with the syntax of the df command:
df [OPTION]... [FILE]...
Let’s see the df command in action. By default, with no options supplied, the df command will list the size of individual volumes in a format that isn’t quite readable.
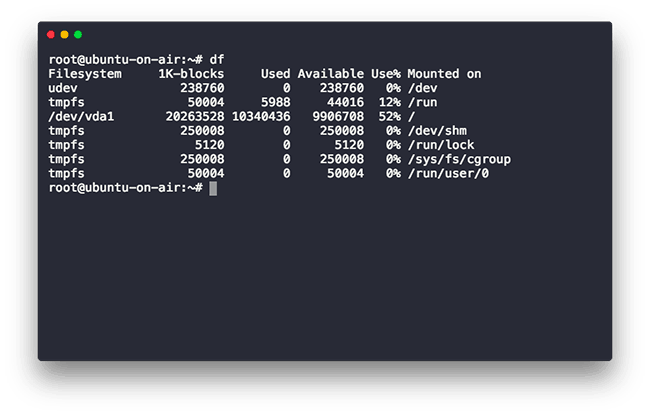
So to avert that, we will use the -h flag, which stands for the human readable format. Enter the following command
df -h
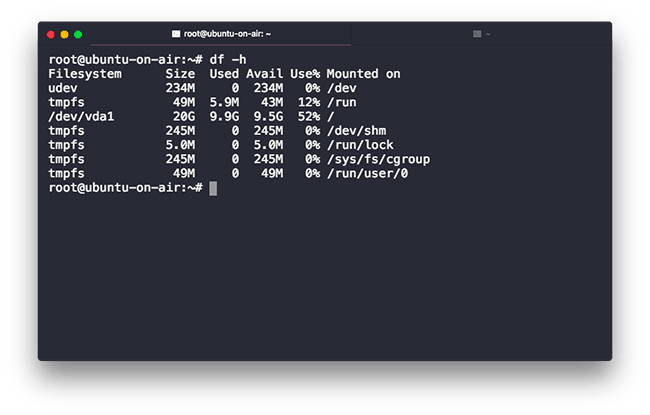
And now, as you can see, it has listed the volume size in Megabytes and Gigabytes. There are a bunch more options that the df command supports and I would suggest you check them out using the man command.
5. du Command
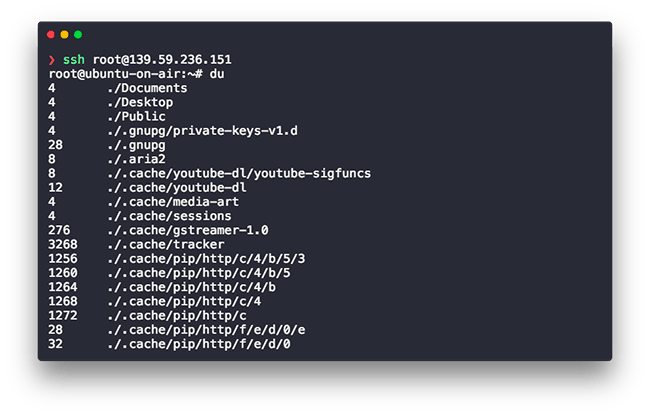
We saw how we can check out the disk space stats for our machine but that is only one step towards full control. How about we check out the space occupied by individual files. To do so we use the du command which estimates the disk space used by files.
Here’s the syntax for the du command:
du [OPTION]... [FILE]...
By default, without any options supplied, we can see that the command lists out the files and space they take in a non-readable format.
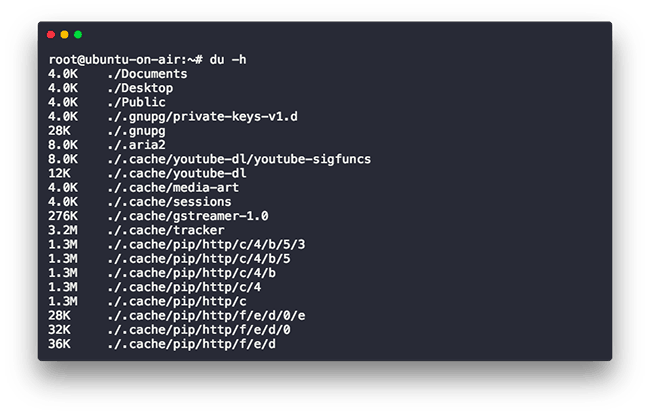
To make more sense out of them lets use the -h option again, which will display the things in a human-readable format.
du -h
As you can see below, now it has listed the space taken by all types of file in units we are familiar with.
We can also go ahead and check for the size occupied by a particular file type in a directory using the -s flag. Let’s check for text files in the current directory.
du -s *.txt

6. passwd Command
Next step in having full control over the system would be actually being able to change the password. I mean what good is a system administrator if he get’s locked out of his own machine right? cool so we will take a look at how to change the password and to do so we use the passwd command.
Here’s the syntax for the passwd command:
passwd [OPTION] [USER]
And now here’s how we use the passwd command:
passwd
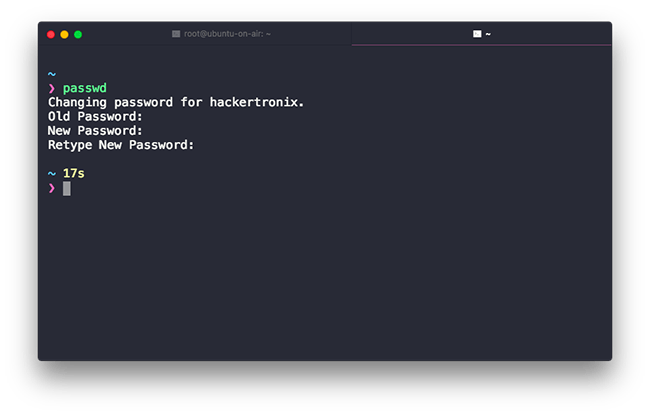
Now obviously for security reasons, Linux and Unix do not show the password in the form of asterisks on the console because by getting to know the length of a password, you can get 1 step closer to brute forcing it, but take my word for it and try it out, it works.
Alright, let’s keep moving along.
7. wget Command
Next up let’s see how you can download files right from your terminal. If you’re already saying to this to yourself “is there anything that he’s gonna leave for the UI?”, thanks but I’ll try not to.
To download files off of the internet, we’ll use the wget command which stands for web get. And it’s a command line utility to download the file over a network. It’s very easy to use the wget command. You just need to specify the URL to the file to be downloaded after the wget command.
For the sake of structure, here’s the syntax:
wget URL_OF_FILE
And here’s a sample usage.
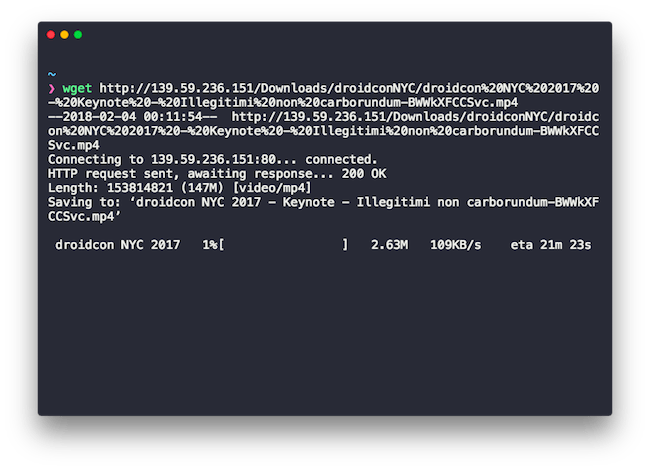
What’s interesting about wget is that it can resume the download if it fails due to a network issue or other reasons.
8 who Command
For a system administrator, access control is another one of the important roles. They need to manage access to the main system and check and monitor the activities of the ones currently logged in. This next command will help you check out who’s currently logged in to the system. The command is called who and here’s the syntax for it.
who [ OPTION ]... [ FILE ] [ am i ]
Let’s check out how the who command works:
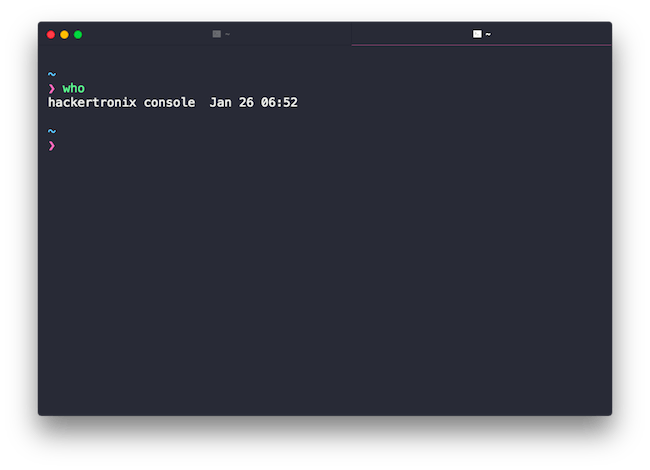
Now, since I am on a single user machine and only I am using it right now, the only user you can see in the screenshot is me. But assuming your managing a production server with several 100 users logged in at the same time, then you would see them on the same list. Make sure you test out all the options available to who using the man command.
9. ping Command
Alright. With this next command, we’ll check if a remote host is online or not. To do so we use the ping command. In the most primitive technical explanation, this means that the command will send ICMP ECHO_REQUEST packets to the host to check its availability. If the host is available, it will respond with an acknowledgment and if it’s not, the packets will be dropped. Let’s see how to use the ping command.
The syntax is pretty straightforward.
ping [-LRUbdfnqrvVaAB] [-c count] [-m mark] [-i interval] [-l preload]
     [-p pattern] [-s packetsize] [-t ttl] [-w deadline] [-F flowlabel]
     [-I interface] [-M hint] [-N nioption] [-Q tos] [-S sndbuf]
     [-T timestamp option] [-W timeout] [hop ...] destination
And here’s a sample usage.
ping google.com
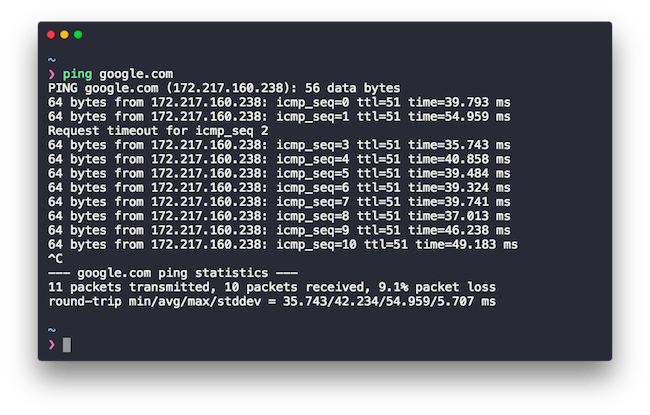
This command mostly comes to use when trying to troubleshoot network issues. The ping command’s output contains a couple of different stats. First, it contains the ICMP sequence number that tells the packet number. Along with that it also contains the TTL field which specifies the time to live for a packet i.e. The number of routers it can hop to before actually being discarded.
10. shutdown Command
Alright, we are finally at the end of this part. Let’s formally close this one with learning how to shut down the system from the terminal. We will also see how to restart the system right from the terminal itself. Now since this command actually shuts down the machine I will show a demo on my server, which I will access using a secure shell via my host machine. Here’s the syntax for the shutdown command:
shutdown [-akrhPHfFnc] [-t sec] time [message]
To shut down the machine, we simply issue the shutdown command without any options. And in order to restart it, you can use the -r flag. Here’s what it would look like with the -r flag.
shutdown -r
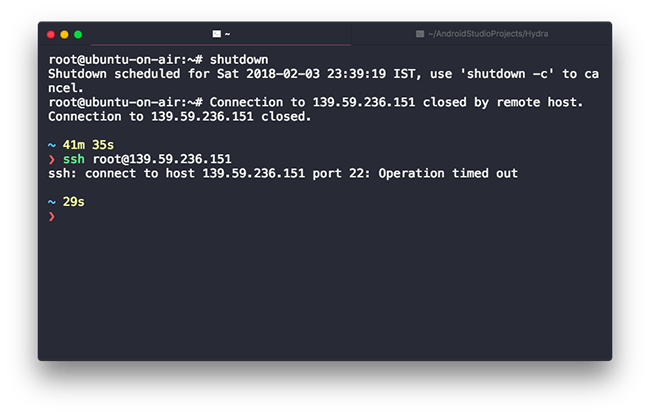
And well, there’s not much to actually “see” in the demo except the fact that your system would shut down. You can check out the video above where I show my server actually turning off after the execution of the command.
Conclusion
Alright, folks, we’ve come to end of Part 3 of the Linux Hands On series. Part 1 covered the very basics, then we built on top of it in Part 2 and in Part 3 we focused on the system administration aspect of Linux. As always, I would highly recommend that you try out these advanced Linux terminal commands instead of just reading the post or watching the videos. One of the things I highly regard is proficiency and that comes with extensive practice. Make sure you do that and if you run into errors, or have a question, write to us in the comments section or on Twitter. I will see you again next week with the final part of this series and boy is it going to be a fun one. While I go and draft Part 4, take out some time and practice these commands. Until next time! Happy Coding!
Francesco S. Myers
This article is a fantastic resource for anyone looking to deepen their understanding of Linux system administration. The step-by-step explanations of advanced terminal commands are both clear and comprehensive, making it easy to follow along. The practical examples and detailed syntax breakdowns are particularly helpful for hands-on learners. Additionally, the emphasis on productivity-boosting techniques like command aliasing is a great touch. Overall, this guide is an excellent addition to the Linux Hands On series, providing valuable knowledge and encouraging readers to practice and refine their skills.